Enterprise Application Final Project : Node

In the last part of our Enterprise Application Final Project series, we discussed mostly on the Angular side. Today we will be handling the Node side using Node, Express 4 and its Router, and MYSQL for the database.

========================================================

Here is what we’ll be doing:

  • Handle CRUD for a recruitment (we’re going to use local database)
  • Use the proper HTTP verbs to make it RESTful (GET, POST PUT and DELETE)
  • Return JSON data

Before we continue, make sure that you have Node installed!

========================================================

Structure

Here is our file structure.

config
  - dbServer.json
models
  - m_recruitment.js
routes
  - recruitment.js
main.js
package.json

========================================================

Defining Node Packages

We will define the packages we need in package.json

{
  "name": "EA_Project",
  "version": "1.0.0",
  "keywords": ["util", "functional", "server", "client", "browser"],
  "contributors": [],
  "dependencies": {
      "body-parser": "~1.13.2",
      "express": "~4.13.1",
      "jsonwebtoken": "^6.2.0",
      "mysql": "^2.10.2",
      "redis": "^2.6.0-2",
      "sequelize": "^3.3.2"
      }
}

body-parser will let us pull POST content from our HTTP request.

express is the Node framework

jsonwebtoken is a compact token format intended for space constrained environments such as HTTP Authorization headers and URI query parameters.

mysql is the Relational Database Management System (RDBMS)

redis is a data structure server, that can contain strings, lists, sets, hashes and other data structures.

sequelize is the ORM for Node

========================================================

Installing Node Package

Now, go into the command line in the root of your application and type this

npm install

npm will now pull in all the packages defined into a node-module folder in our project.

What is npm?

npm is Node’s package manager for the Javascript runtime environment Node.js. It will bring us all defined packages into our project.

========================================================

Setting Up Our Server

We will set our server. Insert the following code to your main.js

//SETUP 
//=====================================================================

//call the packages we need
var express = require('express');  // call express
var app = express(); //define our app using express
var bodyParser = require('body-parser');
var http = require('http');
var fs = require("fs");
var path = require("path");
var models = require("./models");

var server;
var port = process.env.PORT || 8082; // set the port

var recruitment = require('./routes/recruitment');

// configure app to use bodyParser()
// this will let us get the data from a POST
app.use(bodyParser.json());
app.use(bodyParser.urlencoded({ extended: true }));

app.use(function (req, res, next) {
 console.log(req.originalUrl);
 console.log(req.body);
 console.log(req.params);
 res.setHeader('Access-Control-Allow-Origin', '*');
 res.setHeader('Access-Control-Allow-Methods', 'GET, POST, PUT, DELETE, OPTIONS');
 res.setHeader('Access-Control-Allow-Headers', 'Content-Type, X-Access-Token');
 
 next();
});

app.options('*', function(req, res) {
 res.sendStatus(200);
});

//REGISTER OUR ROUTES
//=====================================================================
app.use('/recruitment', recruitment);

Setup In the setup part, we pull in all the packages that we get when we did npm install. We can change the port, as long as it is not used by other application.

========================================================

Database

Creating Database and Syncing

Now you have to create your local database. For this project, I set the name as ea_project. We will defined our database in dbServer.json

{
 "username": "root",
 "password": "",
 "database": "ea_project",
 "config": {
     "host": "127.0.0.1",
     "dialect": "mysql"
     }
}

Let’s continue to set model to our database. Add this code to your main.js

//SYNC THIS MODEL TO THE DATABASE //===================================================================== models.sequelize.sync({force: true}).then(function () {
 server = http.createServer(app); server.listen(port);
 console.log('Server started '); 
});

Sync This Model to The Database We sync our model to our database. The console will simply print out.

========================================================

Modeling

For this project, we will create for recruitment. Therefore the only model we need to create is recruitment. Add the following code to your m_recruitment.js

"use strict"

module.exports = function(sequelize, DataTypes) {
   var Recruitment = sequelize.define("Recruitment", {
   name: {
     type: DataTypes.STRING,
     allowNull: false
   },
   address: {
     type: DataTypes.STRING,
     allowNull: false
   },
   contact: {
     type: DataTypes.STRING,
     allowNull: false,
   },
   email: {
     type: DataTypes.STRING,
     allowNull: false
   },
   refferer: {
     type: DataTypes.STRING,
     allowNull: true
   },
   position: {
     type: DataTypes.STRING,
     allowNull: false
   },
   pay: {
     type: DataTypes.STRING,
     allowNull: false
   },
   company: {
     type: DataTypes.STRING
   },
   caddress: {
     type: DataTypes.STRING
   },
   ccontact: {
     type: DataTypes.STRING
   },
   cjob: {
     type: DataTypes.STRING
   },
   school: {
     type: DataTypes.STRING,
     allowNull: false
   },
   saddress: {
     type: DataTypes.STRING,
     allowNull: false
   },
   scontact: {
     type: DataTypes.STRING,
     allowNull: false
   },
   sadditional : {
     type: DataTypes.STRING
   },
   rname : {
     type: DataTypes.STRING 
   },
   roccupation : {
     type: DataTypes.STRING
   },
   rcontact : {
     type: DataTypes.STRING
   }
 }, {
     id: false,
     updatedAt: false,
     createdAt: false
  });
  return Recruitment;
};

Those code will create a table in our database with all field and conditions as listed.

========================================================

Routing

Here is an overview of the routes we will require, what they do and the HTTP Verb used to access it

Route HTTP Verb Description
/recruitment GET Get all recruitments data
/recruitment POST Add a recruitment

These following code simply add and get data of recruitment. Insert these code into recruitment.js

var express = require('express');
var router = express.Router();
var models = require('../models');

var Recruitment = models.Recruitment;

//Get all recruitments
router.get('/', function (req, res) {
   Recruitment.findAll()
   .then(function(result) {
   res.status(200).send(result);
   });
});

//Add a recruitment
router.post('/', function (req, res) {
   Recruitment.create({
     name: req.body.name,
     address: req.body.address,
     contact: req.body.contact,
     email: req.body.email,
     refferer: req.body.refferer,
     position: req.body.position,
     pay: req.body.pay,
     company: req.body.company,
     caddress: req.body.caddress,
     ccontact: req.body.ccontact,
     cjob: req.body.cjob,
     school: req.body.school,
     saddress : req.body.saddress,
     scontact : req.body.scontact,
     sadditional : req.body.sadditional,
     rname : req.body.rname,
     roccupation : req.body.roccupation,
     rcontact : req.body.rcontact 
   }).then(function(result) {
     res.status(200).send({
       status: 'Data inputed successfully!'
     });
   });
  });

module.exports = router;

========================================================

Now you have finished the back end part.

If you have done with the Angular connected to database part, you only need to run your Xampp, your Back End part (Node) and run the Front End part (Angular)

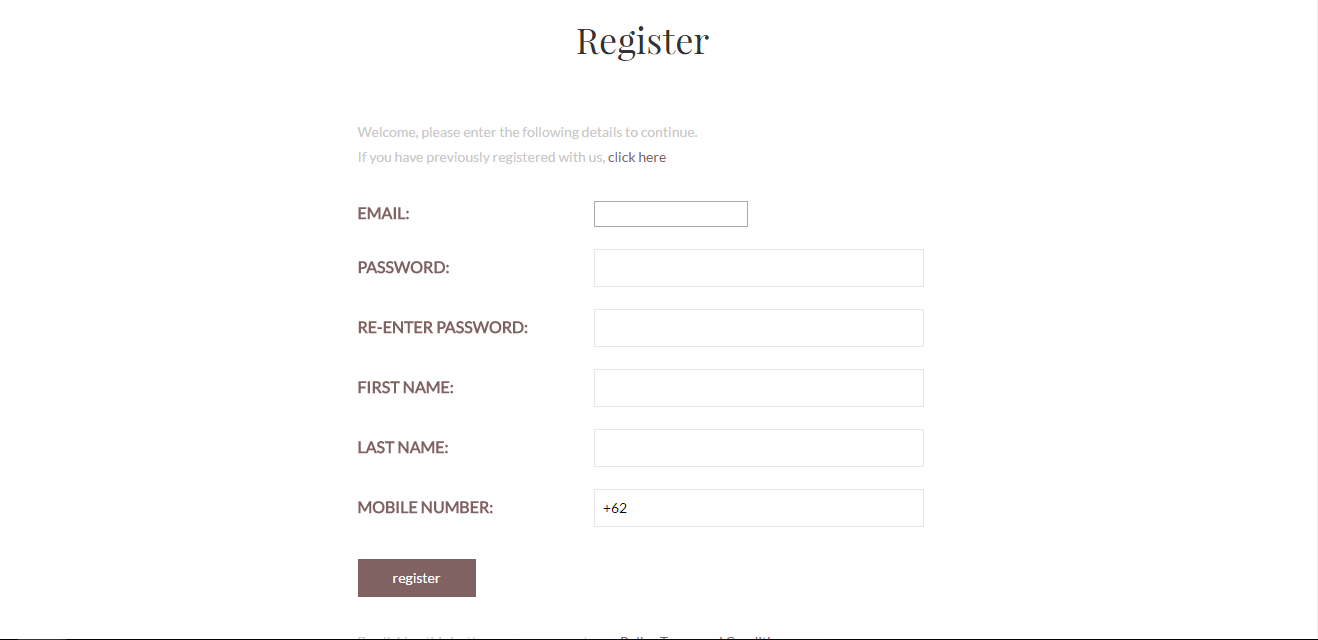
Go to recruitment page in the menu, then fill the field. For example : input recruitment data

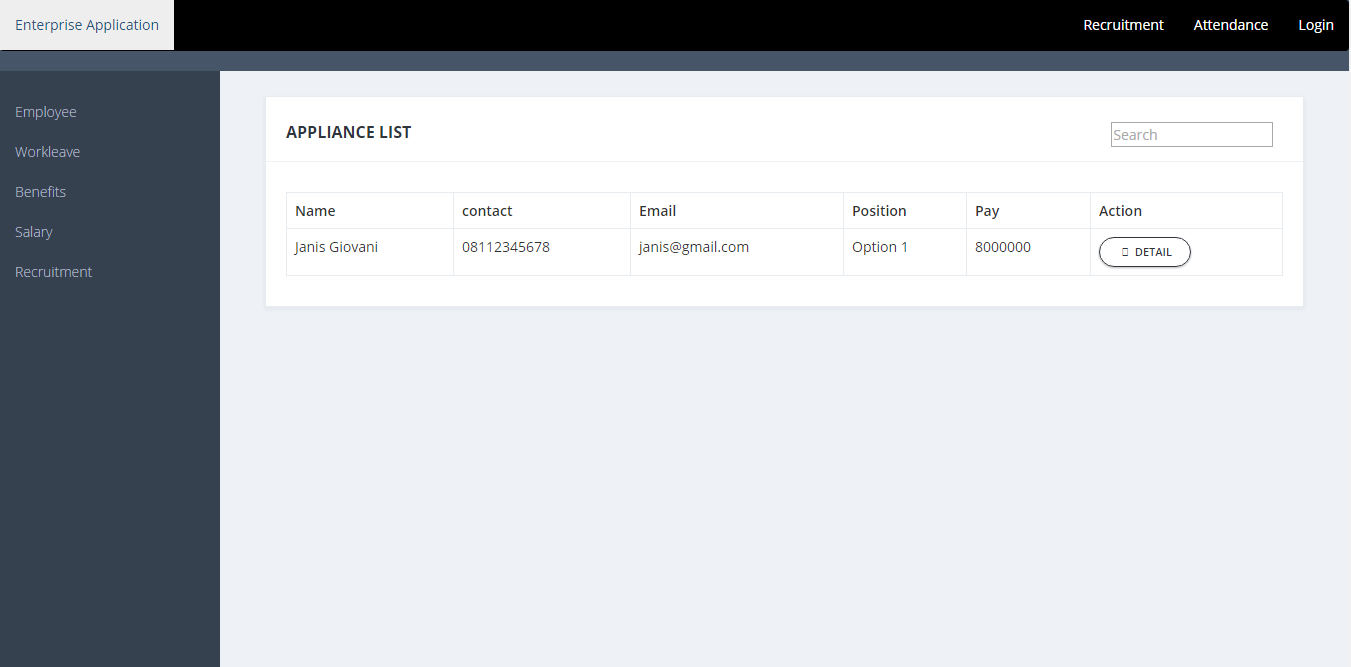
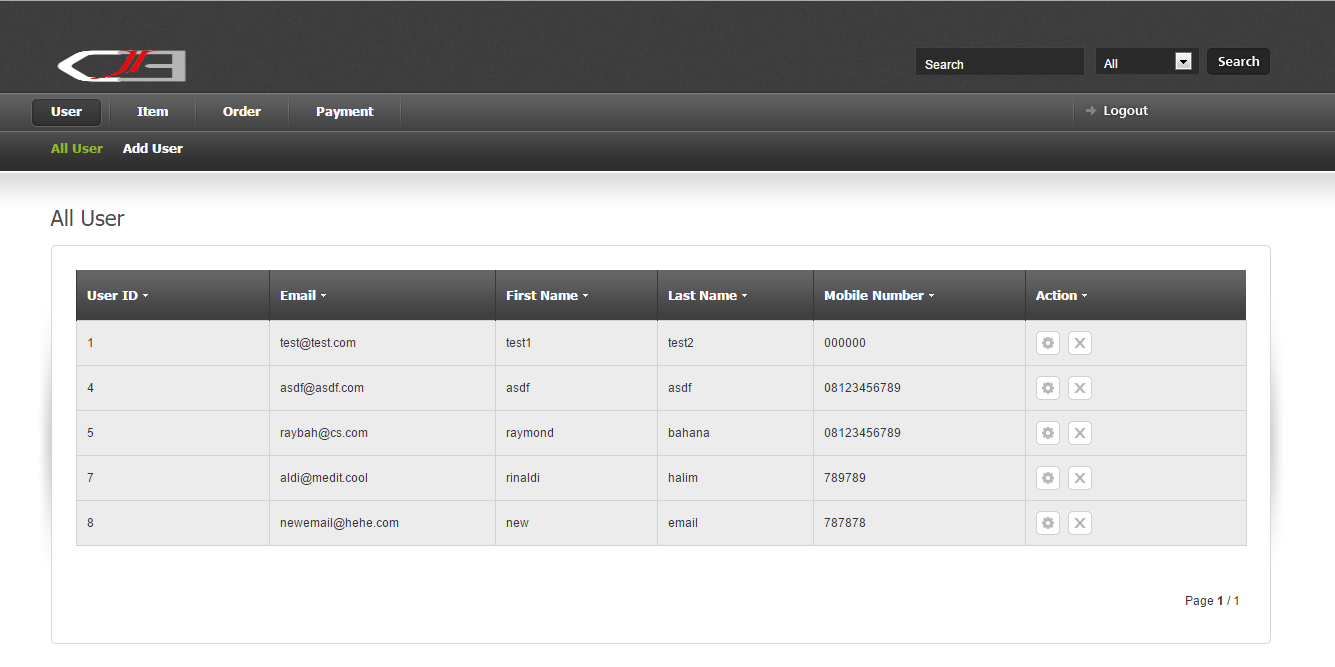
After that, login as admin and see the Recuitment part.

If your inputed data is available there, then you have successfully finished this project

List of recuitment


*********************************************************

Chelsy                           1701319994                                                                   Evelyn Kharisma          1701320825                                                                   Fansi Lantana               1701341741                                                                 Janis Giovani Tan         1701320560

Enterprise Application Final Project: AngularJs + NodeJs

In Enterprise Application course, we are to set up an web application to help business process in enterprise. Our team decide to develop a Human Resource Management Web Application which modules include recruitment, benefits and payroll. We are also required to post tutorial on how we build this application, and so here it is:

Introduction to AngularJS                                                                                       AngularJS is a JavaScript Framework that lets you extend HTML vocabulary for your application. It is a fully client-side framework that implements the Single-Page Application principles. AngularJS’s templating is based on bidirectional UI Data-Binding. Data-binding is an automatic way of updating the view whenever the model changes, as well as updating the model whenever the view changes. The HTML template is compiled in the browser. The compilation step creates pure HTML, which the browser re-renders into the live view. The step is repeated for subsequent page views. In traditional server-side HTML programming, concepts such as controller and model interact within a server process to produce new HTML views. In the AngularJS framework, the controller and model states are maintained within the client browser. Therefore, new pages are capable of being generated without any interaction with a server.

Tutorial of AngularJS With Database                                                                     Here we will give some tutorial on how to develop AngularJS with connection to database. This will be a continuation to our previous post: Enterprise Application Final Project: AngularJs

Project Structure:

– Project_Title

– app (Folder)

– admin (Folder)

– adminService.js

– recruitment_detail.html

– recruitment_detail.js

– attendance (Folder)

– css (Folder)

– employee (Folder)

– home (Folder)

– home.html

– home.js

– img (Folder)

– login (Folder)

– login.html

– login.js

– loginService.js

– recruitment (Folder)

– recruitment.html

– recruitment.js

– recruitmentService.js

–  app.js

– index.html

adminService.js

admin service image

change the code for the adminRecruitService into this:

recruitment_detail.js

recruitment detail image

change the code for the getRecruits() in the controller into this:

Now you are done with the code for AngularJS. However, you won’t be able to access database yet. To do that we need backend. We are using NodeJs for out project. Let’s continue to the NodeJs tutorial

*********************************************************

Chelsy                           1701319994                                                                   Evelyn Kharisma          1701320825                                                                   Fansi Lantana               1701341741                                                                 Janis Giovani Tan         1701320560

Enterprise Application Final Project: AngularJs

In Enterprise Application course, we are to set up an web application to help business process in enterprise. Our team decide to develop a Human Resource Management Web Application which modules include recruitment, benefits and payroll. We are also required to post tutorial on how we build this application, and so here it is:

Introduction to AngularJS                                                                                       AngularJS is a JavaScript Framework that lets you extend HTML vocabulary for your application. It is a fully client-side framework that implements the Single-Page Application principles. AngularJS’s templating is based on bidirectional UI Data-Binding. Data-binding is an automatic way of updating the view whenever the model changes, as well as updating the model whenever the view changes. The HTML template is compiled in the browser. The compilation step creates pure HTML, which the browser re-renders into the live view. The step is repeated for subsequent page views. In traditional server-side HTML programming, concepts such as controller and model interact within a server process to produce new HTML views. In the AngularJS framework, the controller and model states are maintained within the client browser. Therefore, new pages are capable of being generated without any interaction with a server.

Tutorial of AngularJS Static (Without Database)                                                 Here we will give some tutorial on how to develop static AngularJS without connection to database. In this section, we will only discuss about the recruitment module.

Project Structure:

– Project_Title

– app (Folder)

– admin (Folder)

– adminService.js

– recruitment_detail.html

– recruitment_detail.js

– attendance (Folder)

– css (Folder)

– employee (Folder)

– home (Folder)

– home.html

– home.js

– img (Folder)

– login (Folder)

– login.html

– login.js

– loginService.js

– recruitment (Folder)

– recruitment.html

– recruitment.js

– recruitmentService.js

–  app.js

– index.html

Index.html

index.html image


In index.html, we put the template of the whole web. This include: css, js, header, footer, and all component that won’t change as you navigate around the web.

<a href = “#!/”></a>  –> will search for ‘/’ routeProvider condition in the controller.

<div ng-view></div>  –> a tag that simply creates a place holder where a corresponding view (html or ng-template view) can be placed based on the configuration.                                                 remember to declare all of the css and JavaScript that you use in the web here (this include the js file that you create (controllers and services).

app.js

app.js image

declare all of the app level module that depends on views and components. For example:

ngRoute, myApp.recruitment, myApp.home (own created module).

app.js is a controller, here we give a routing function to redirect to home.html when the web is first run.

home.html

home.html image1

this is the first page that will be shown when you run the web. Click on the recruitment to redirect to the recruitment page.

home.html image2

recruitment.html

recruitment.html image

recruitment.html image2

ng-submit –> to define what function to call when the submit button in a form is clicked.

ng-class –> is a directive dynamically binds one or more CSS classes to an HTML element.

ng-model –> is a directive you can bind the value of an input field to a variable created in AngularJS.

ng-show –> is a directive that shows the specified HTML element if the condition specified is true, otherwise the HTML element is hidden.

ng-disabled –> is a directive that sets a form field (input, select, textarea, or button) into disabled when the condition specified return true.

validation in recruitment.html image

recuitment in admin site

input recruitment fields

inputed data in admin site

recruitment.js

recuitment.js image

recuitment.js image2

the routeProvider here will let server know where to redirect when ‘/recruitment’ is called and what controller will be used in that page.

Then, create  the controller for the recruitment in this case RecruitmentCtrl, define the $scope ( an object for binding between the recruitment.html and RecruitmentCtrl) and the services that will be referred in the controller in this case recruitService.

$scope.recruit is to declare the function recruit() that can be called in the recruitment.html. When this function is called it will call to the function addRecruit() in the recruitService and pass all the input in the recruit.html for as the parameter.

recruitmentService.js

recruitment service image

Here we create the service for the recruitment, we named it recruitService. As before don’t forget to declare all the module to be used in this service ($location, adminRecruitService).           Next, we declare the function addRecruit(data) which again pass the data to the admin by calling to the addRecruit(data) in the adminRecruitService.

$location.path(‘/’) –> is used to redirect user to the home page when the submit button in recruitment is clicked.

adminService.js

admin Service – img1

admin Service – img2

In this js file, all of the services related to the admin functionality is declared.

The adminRecruitService is declared here. var recruits is to initialize variable and give some static data to the recruits. getRecruits() function is to return all of the data in the recruits array and addRecruit(data) is a function to push additional data into the recruits array.

Only admin that will be able to see the list of all people that apply to the company so next we create the login function and the recruitment list in the admin page.

login.html

login.html image

Similar to the recruitment.html we create a form in this file, however we add an ng-if which is a directive that remove the HTML element when the condition is false, meaning this error message will only be shown if there error message return true.

login validation image

login – error message

login.js

login.js image

the route to ‘/login’ and LoginCtrl is set in this js file. Create a login() function which will be called when the login button is clicked then again call the login(username, password) function in AuthenticationService to verify the user login.

loginService.js

loginservice.js image

Here we declare the AuthenticationService and the function login(username, password) in it. The function will check the user input and redirect to admin page or employee page based on the role. However, if the input does not match any of the data then it will return error and will be shown by the ng-if in the login.html.

recruitment_detail.html

recuitment_detail.html image

We create a table to show all of the applicants. Let’s add some search and sorting function for this table.

ng-model=”search” –> to bind the input in this field with variable in AngularJS for searching function.

ng-click=”sortColumn(‘name’)” –> when the cell is click will call to the function sort by name.

ng-repeat=”recruit in recruits | filter:search

orderBy:column:reverseSort” –> to loop across all recruits array, in each looping store the data of index loop to recruit. Filter the table based on the input in the search field if it is filled and lastly, Order the table based on user choice.

recruitment_detail.js

recuitment_detail.js image

set the routing and create the controller like before.

call the getRecruits() in adminRecruitService to get the recruits array and initialize the value to $scope.recruits which will be looped in the

recruitment_detail.html

recuitment_detail.html image

set the sortColumn(colname) function for sorting the table.

Next let’s learn how to connect this recruitment to database. Enterprise Application Final Project: AngularJs + NodeJs

*********************************************************

Chelsy                           1701319994                                                                   Evelyn Kharisma          1701320825                                                                   Fansi Lantana               1701341741                                                                 Janis Giovani Tan         1701320560

Scripting Language – Final Project Report

Project Brief

One of the requirements of completing the Scripting Language course we have to set up the given website. The Batik Lansem for Pusaka Beruang website was designed by Deadra Ivanka Qintara, Art and Design student of BINUS International students. We as Computer Science students will take part in back end by providing and adding features for real website. Our team consists of three people; Chelsy, Edward Leonardi and me, Janis Giovani Tan. Each of us has different roles,

  1. Chelsy : Administrative Panel, Database Design, Template Inputting.
  2. Edward : Back End User
  3. Janis : Back End Admin

To support the features of website, as suggested we were used Code Igniter for PHP framework. HTML, CSS also Javascript for the front end and MySQL for database.


Features

1. Primary navigation bar (menu)

Navigation for User
Navigation for User

2. Help and login pages

Help Page
Help Page
Login for User
Login for User

3. The title tag to create an appropriate title in every page

Title Tag
Title Tag

4. Registration Form

Registration Form
Registration Form

5. A login/user authorization table in a database

Login or user authorization

6. Administrator page(s)

Login for Admin
Login for Admin

7. Shopping cart

Shopping cart
Shopping cart

8. On Mouse Event

On Mouse Event
On Mouse Event

9. Javascript Functions

Image slider

Javascript Function - Image slider
Javascript Function – Image slider

Zoom Image

zoom image

10. Inventory table

Inventory Table
Inventory Table

Web Details

1. User site

a. Login and Registration Page

Users are required to login before make any order. For new user, they can go to registration page and fill all information.

b. About Page

We provide information about Pusaka Beruang in this page. User can access this page through navigation bar

c. History Page

The history of Lasem, Batik Lasem and Indonesian Batik is provided in this page

d. Culture

This page consist of information about culture of Lasem

d. Pattern

Pattern Page will present all pattern available in Batik Pusaka automatically.

e. Product

This page will show all the product and allow customer to add item to cart directly or click the item to get more detail information regarding the item.

f. Help

Help Page provide user with information in navigating and using the e-commerce website.


2. Admin Site

We are required to login first before go to admin site. After that, we provide user, item, order and payment menu. For each menu, we allow admin to see, add and edit its information.


Here is the video of our website